
Dwarven Pride


“In the Deep Halls, Far from Men
Forsaken Red Mountain, Twisted Kin
Hail the Mind, Hail the Stone
Dwarven Pride, Stronger than Bone”
—Dwemer Inquiries Vol I Their Architecture and Civilization, Thelwe Ghelein
Summary
Dwarven Pride is a quest revolving around a very angry Dark Elf named Satar-Dan who lives on the shores of Solstheim and in the shadow of Tel Mithryn. He sits staring out to Red Mountain, the volcano that erupted, blew its ash all over Morrowind, and made the island an inhospitable wasteland. As evidenced by the tattoo on his forehead, he still has faith in the Tribunal and the ancient customs of his people. He bides his time with his Dunmer ancestors who keep him company.
The first time the player talks to Satar-Dan, they are greeted with his bedside manners. He wants the player gone and out of his sight.

Fig. 1
The conversation in Figure 1 advances the quest by one point and activates the second conversation branch. This is so that the next time the player speaks with Satar-Dan, he will not repeat the question from the first time the player spoke with him. The second branch, however, is a dead end. Satar-Dan does not want to continue the conversation, as seen in Figure 2. Each time the player initiates a conversation with him, he boots them out.
The rows in Figure 2 represent different responses that Satar-Dan can give based upon the race of the player. Each row uses logic to designate what Satar-Dan would say depending upon the player’s race. If the player is using a custom race from another mod, the top dialogue is a failsafe: It is only spoken when all other logic operations within the conversation branch return false for every player race.

Fig. 2
After being irritated by Satar-Dan’s mood, the player can explore his house. Immediately upon loading into his house, the quest moves another point. The quest moves to this point regardless of whether or not the player has ever spoken with him before. By entering his house and not speaking with him, the player completely skips the first two dialogue branches.

Fig. 3
The response that Satar-Dan delivers gives him a little bit of intelligence and might take the player off-guard: He is aware the player has gone into his house. If the player just enters and does nothing inside his house, Satar-Dan will continue to repeat the dialogue in Figure 3.
Figure 4 is a direct copy of Figure 3, but it is not a dead end. Satar-Dan switches to his conversation branch when the player continues to pilfer his house and finds a sketchbook. The sketchbook is an interactive book within the game and can be opened and read. Upon opening, the player sees a strange Dark Elf drawing. The book is just enough to get Satar-Dan to start talking. He offers to tell the player about his artwork if the player leaves him alone. However, it is never that easy in roleplaying games.

Fig. 4
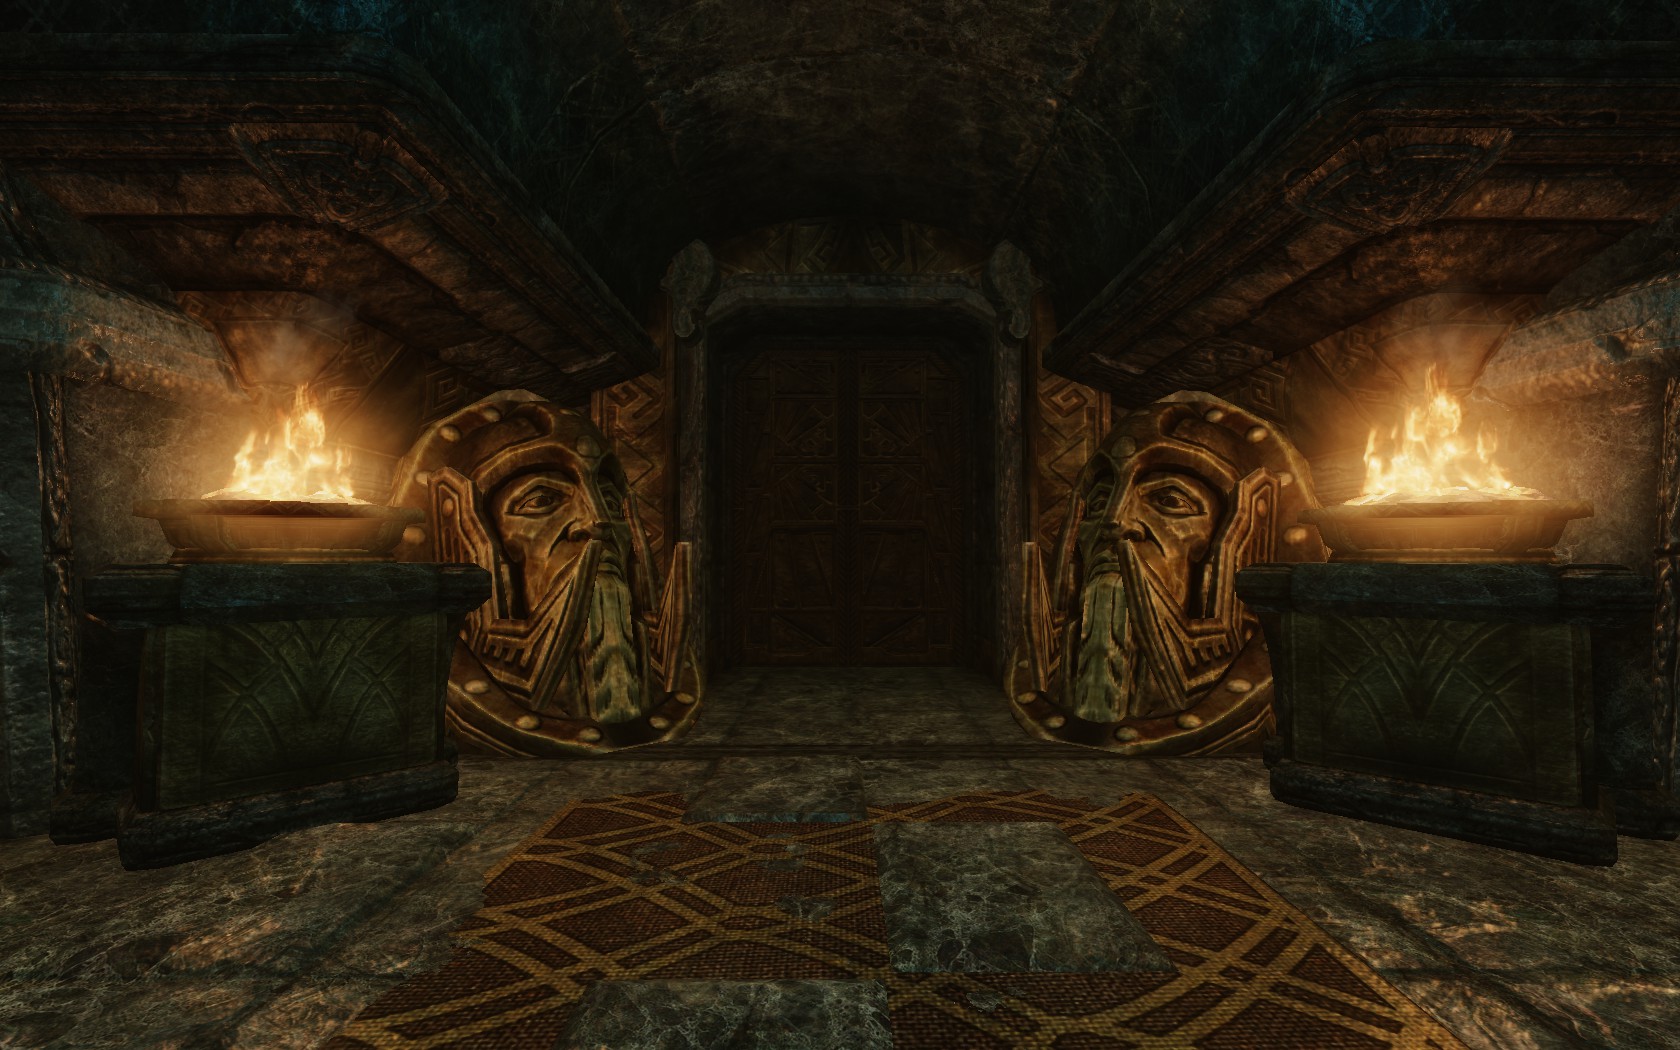
The quest marker heads toward and the key unlocks one of the doors. The player takes an elevator down and appears in the dark Dwemer ruin called the Tonal Oubliette. Named after a type of notorious dungeon, it is built like a cylindrical spiral. Oubliette—which comes from the French word meaning “to forget”—gets its notoriety by being a dungeon where the prisoner is put into a deep, sometimes claustrophobic, hole in the ground. In The Elder Scrolls universe, the Dwemer were maleficent and built deep, sprawling fortresses underground. I thought an oubliette-style dungeon would be a perfect thematic fit for the Dwemer and their subterranean machinations. Since the area is a dungeon by design, the only way for the player to progress down the complex is by passing security checkpoints that take the form of puzzles. If the player is unprepared for the puzzles, steam-powered automatons ambush from their pipes.
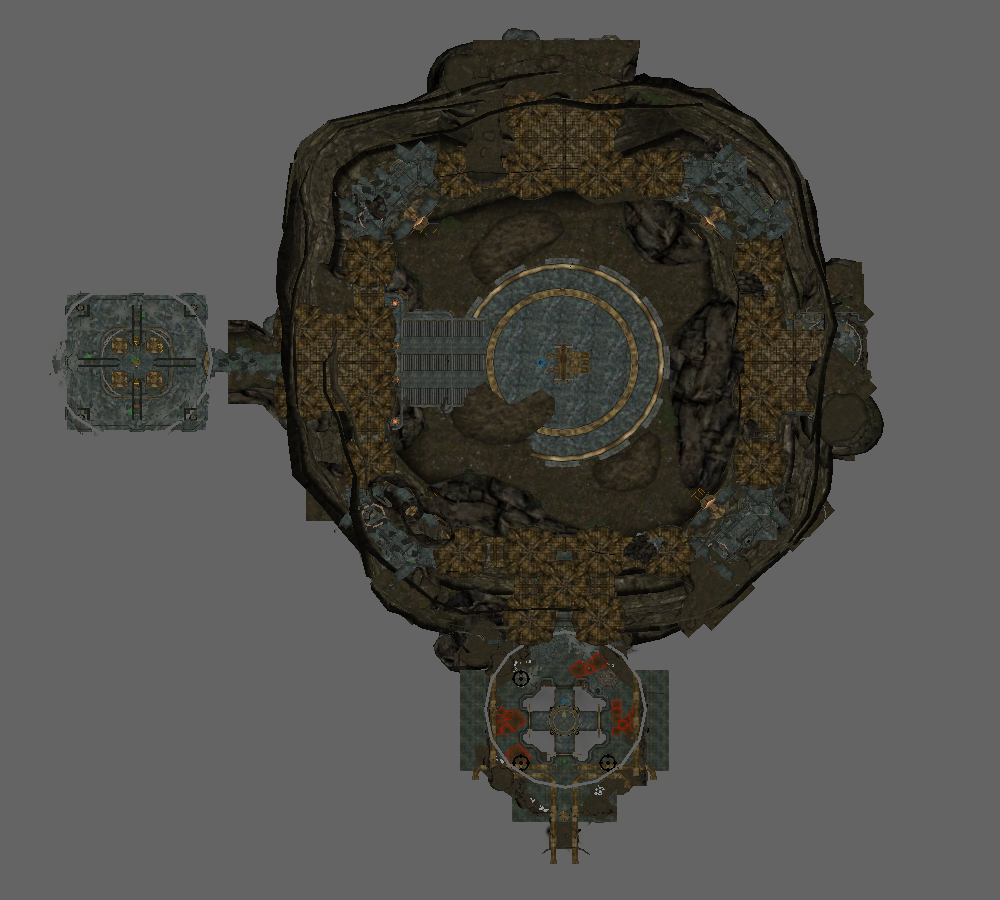
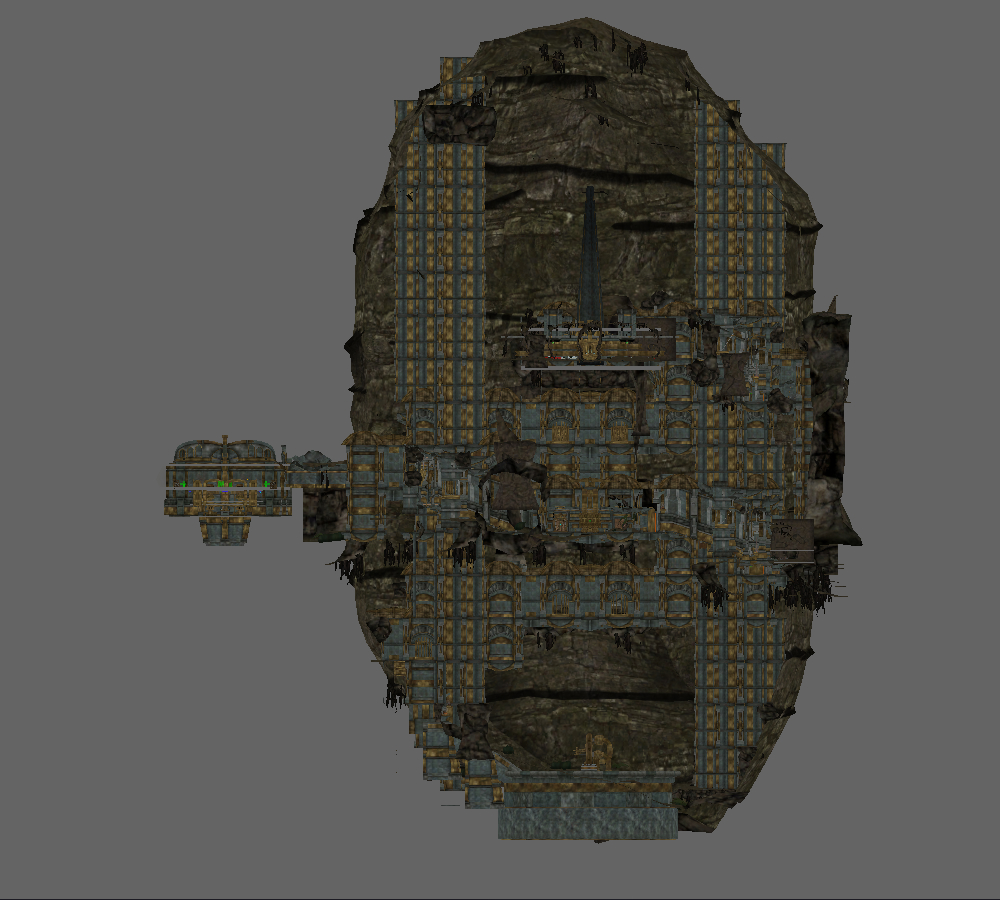
Figures 5-1 through 5-6 show different angles in topographic and isometric views. The oubilette snakes around the cave wall.


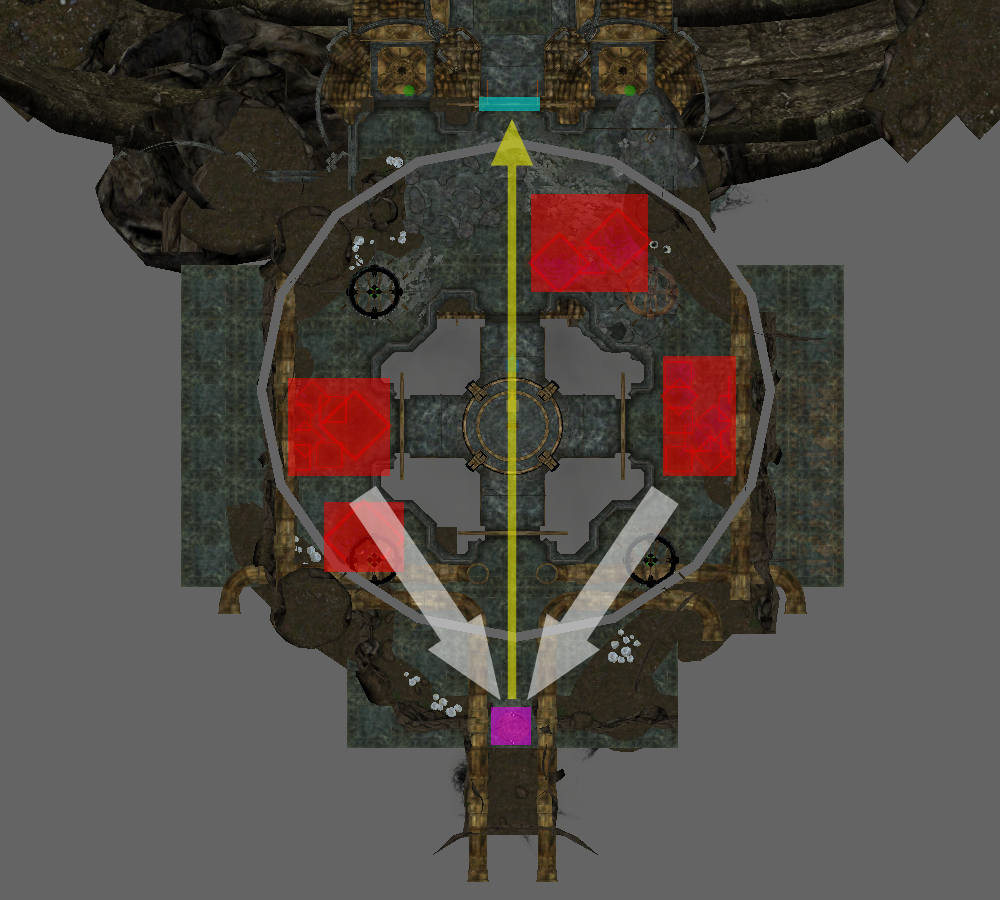
Figures 6-1 through 6-4 are the puzzles, switches, and ambushes of the oubliette. The red squares signify ambushes and hazards; the yellow arrows are activate parents, so one activates the other; the green square is treasure; the teal rectangles are doors; the magenta squares are switches toggled by physics; and the white arrows represent player attacks.
The first puzzle the player encounters in the oubliette is Figure 6-1. The door at the top is locked, so the player searches for a way to open it. After dodging explosive hazards, the player can see the unreachable switch. Large pipes and boulders block the player from being able to activate the switch, so the player has to use either a bow and arrow or a spell to toggle it. There are two ways to hit the switch depending upon which way the player chooses to go.
The second puzzle in Figure 6-2 is similar to Figure 6-1, but it does not open a door to continue down into the dungeon. Instead, it opens a door so the player can grab some loot. Once again, there is rubble blocking the access to the switch. The player shoots through a hole in the wall to activate the door. By implementing this gameplay mechanic twice, we have taught the player how puzzles will act from here on out.
The simplest puzzle is Figure 6-3, but features out first enemy ambush. Before this point, there had not been a single mechanical enemy. By activating the switch in the middle of the room, pipe doors swing open. Dwemer sphere guardians roll out and attack the player from the sides, blocking the exit to the unlocked door.
The final puzzle in Figure 6-4 is the most complex and involves three switches and three doors: the bottom switch activates the top door, which leads to the right switch. Upon activating the switch, four steam spiders spring from their casing and the middle door is unlocked. Once the middle switch is activated, the final door is opened and the player can continue to the deepest part of the oubliette.


After exploring the Dwemer ruin that unlocks with the key Satar-Dan gave the player, the player comes to a locked door. Satar-Dan is not happy that the player has returned to him for advise. He explains that he cannot help with the door the player has found, but he does have another key that goes to a different area.

Fig. 7
Figure 7 is the final piece of dialogue with Satar-Dan and marks the final part of the quest. After the player is given the key to search the other ruins, another key is found, which unlocks the door the player could not open previously. When the boss of the final area is defeated, the quest completes and Satar-Dan’s conversation returns to the dead end in Figure 3.
Design
Use the Dark Elf Solstheim and Dwemer kits to make the Satar-Dan’s house and the Dwemer ruins.
Place lights sparingly and use thematically appropriate colors to keep the level dusty and dark.
Create custom ambient cell lighting and distance fog.
Set the ruin’s music to the Dwemer preset and the acoustic space to the Dwemer preset.
Add appropriate clutter to give off the impression of a lived house and untouched ruins.
Place animated objects like gears, sparks, and flames with corresponding sound effects.
Story
Write all the spoken dialogue and quest journal entries.
Record the lines for Satar-Dan as WAV audio files, clean them in Audacity, and convert them into Skyrim’s FUZ audio format.
Add idle animations and facial expressions as Satar-Dan says his lines.
String together dialogue trees with attached Papyrus scripts to move the quest along.
Edit Satar-Dan’s and his ancestor’s AI packages so that they constantly sit and do not interact with the environment.
Encounters
Create navmesh, designate preferred AI paths, and link teleport markers from the previous cell in the quest.
Make trigger boxes with ambush scripts that activate the Dwemer automaton ambush markers.
Place the ambushes far enough apart so the player can have some breathing room and keep the player guessing for when they might appear next.
Stat the Dwemer ghost bosses and give them all unique spells and abilities.
Adjust the AI behavior of the Dwemer bosses so they attack on sight, will never flee, help each other, and give them a wide aggro radius.
Scripts
Reuse on-enter triggers from Skyrim such as changing acoustic space and applying ambient noise, adding first- and third-person camera effects, and playing audio cues.
Reuse quest scripts to update the player’s journal once the final Dwemer boss is defeated.
Playtests
Look for spiderwebbing or seams into the void and remedy them.
Fix any Z-fighting by adjusting positions of static objects and sub-kits.
Install and test on computers with different hardware to check consistency.
Receive and integrate feedback from players knowledgeable in the RPG genre.